How to Use a Rowing Machine?
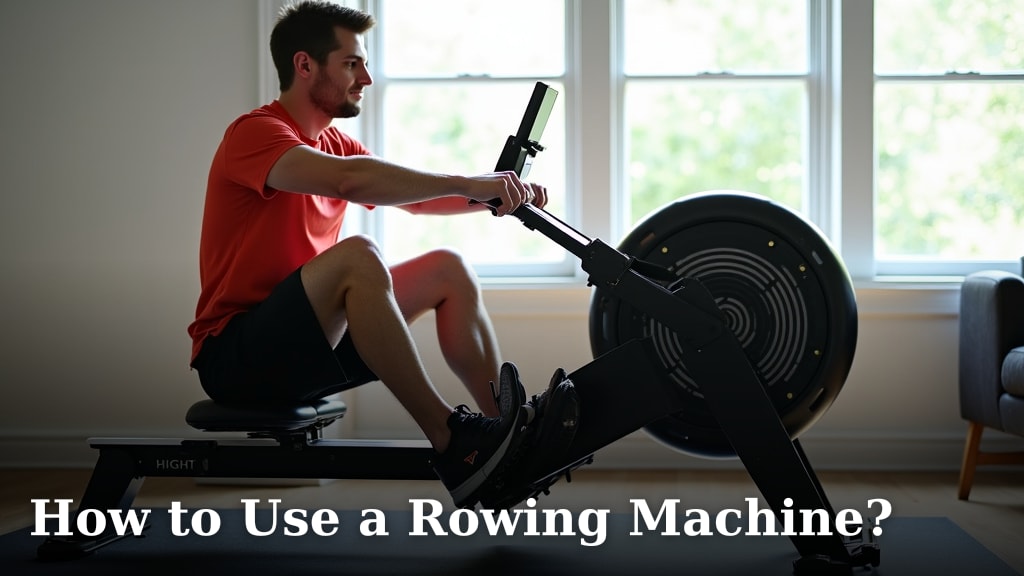
To use a rowing machine, sit on the slider and place your feet into the footrests, securing the straps. You’ll then begin the four-part rowing stroke: the catch, the drive, the finish, and the recovery, repeating this motion smoothly. We found that proper form is key to an effective and injury-free workout.
Rowing machines offer a fantastic full-body workout that builds strength and improves cardiovascular health. Learning proper technique makes all the difference in getting the most out of your exercise. You want to row efficiently and comfortably, right?
- Master the four phases of the rowing stroke.
- Focus on strong leg drive, not just arm pulling.
- Maintain good posture throughout the movement.
- Adjust machine settings for your fitness level.
- Improve cardio and strength with each session.
Ready to get started? Let’s walk through exactly how to master the rowing machine so you can enjoy a great workout.
Getting Started with Your Rowing Machine
You’re ready to start rowing! Before you power through those strokes, let’s make sure you’re comfortable and safe. Proper setup is foundational.
Setting Up Your Rowing Machine for Success
First things first, adjust your machine. This ensures a comfortable and effective workout. Think of it as tailoring the machine to your body.
Adjusting the Footrests
Your feet need to be secure. We found that proper foot placement is key for a strong drive. You want your feet flat against the pads.
- Place your feet in the footrests. The straps should go across the widest part of your foot. This is usually the ball of your foot.
- Tighten the straps snugly. Your heels might lift slightly during the stroke, which is normal.
- Ensure the footrests are positioned correctly. Many machines have adjustable settings. You want the strap to cross just below your toes. This allows you to push off strongly.
Understanding Damper Settings
The damper controls how much air enters the flywheel. This determines the “feel” of your stroke. It’s not a measure of intensity itself (American Council on Exercise).
- A higher damper setting (like 8-10) feels like a heavier boat. It requires more strength but can be harder on your joints. It’s not necessarily “more resistance” like on a bike.
- A lower damper setting (like 1-4) feels like a lighter, faster boat. It allows for a quicker stroke rate and is gentler on your body.
- We recommend starting with a medium damper setting (3-5). This provides a good balance for most beginners. Experiment to find what feels right for you. You should be able to maintain a smooth, controlled stroke.
Mastering the Four Phases of the Rowing Stroke
The core of rowing is a smooth, continuous motion. It breaks down into four parts. Think of it like a dance sequence.
Phase 1: The Catch
This is where your stroke begins. It’s the ready position. We found that a good catch sets up the entire stroke.
- Slide forward on the seat. Your knees are bent, and shins are vertical.
- Your arms are straight and extended towards the flywheel.
- Shoulders are relaxed and level. Your back is straight, but your torso leans slightly forward from your hips.
- The handle should be comfortably gripped with your fingers. Don’t white-knuckle it.
- It’s like preparing for a powerful jump off the footrests.
Phase 2: The Drive
This is the power phase of the stroke. Your legs do most of the work here. Many experts confirm that the legs provide about 60% of the power (Concept2).
- Push off with your legs first. Imagine pushing the entire machine away from your footrests.
- As your legs extend, gently lean back with your torso.
- Then, pull the handle towards your upper abdomen. Your arms come in last.
- Your legs, core, and arms work in a coordinated sequence. It should feel like an explosion of power, not just a pull with your arms.
- Keep your core engaged throughout this phase.
Phase 3: The Finish
You’re at the end of the powerful movement. Hold this position briefly.
- Your legs are fully extended.
- Your torso is leaning back slightly (around 105 to 110 degrees from vertical).
- The handle is pulled to your upper abdomen or lower chest.
- Your elbows are bent and close to your body.
- Shoulders are relaxed. You should feel strong and stable here.
- This position allows your body to recover before the next stroke.
Phase 4: The Recovery
This is the moment to prepare for your next powerful drive. It brings you smoothly back to the catch position.
- Extend your arms straight out towards the flywheel first.
- Then, lean your torso forward from your hips.
- Finally, allow your knees to bend and slide forward on the seat.
- Repeat the sequence: arms, body, then legs.
- Keep it smooth and controlled. Don’t rush back “to catch” the next stroke. We found that rushing the recovery can lead to poor form and injury.
- Your recovery should take about twice as long as your drive. Think slow and controlled.
Form and Technique: What to Watch For
Good form is crucial for an effective and safe workout. It prevents injury and maximizes your effort.
Common Form Mistakes to Avoid
We’ve observed that beginners often fall into predictable errors. Being aware of these can save you a lot of trouble.
- “Arm pulling” instead of leg driving: Don’t just yank the handle with your arms. Remember, legs are primary motors. This is sometimes called the “arm-puller’s curse.”
- Rounding your back: Keep your back straight, especially during the catch and recovery. Poor posture strains your spine (Mayo Clinic).
- Overreaching at the catch: Don’t stretch too far forward. Your shins should be vertical, not past vertical. This protects your lower back.
- “Shooting the slide”: This happens when you push with your legs too fast, before your body and arms are ready. You’ll feel like you’re losing connection with the handle.
- Lifting your shoulders: Keep your shoulders relaxed and down. Tension here can lead to neck and upper back pain. Many people carry stress here, and it can affect rowing form.
Maintaining a Consistent Rhythm
Rhythm is your secret weapon. It helps you conserve energy and row more efficiently.
- Aim for a smooth, steady pace.
- Think of a 1:2 ratio: one count for the drive, two counts for the recovery. Push hard, then glide back.
- Use audio cues if your machine has them. Or try rowing to the beat of a song.
Making the Most of Your Rowing Workout
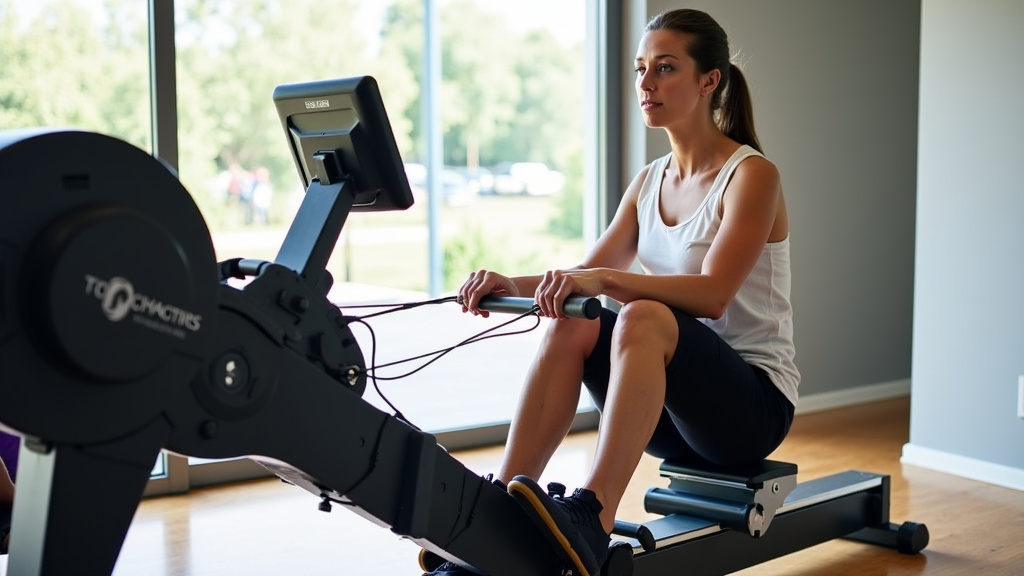
You’ve got the basics down. Now, how do you get a great workout? We recommend focusing on a few key areas.
Understanding Performance Metrics
Your rowing machine displays various metrics. These help you track progress and gauge effort.
| Metric | What It Means | Why It Matters |
|---|---|---|
| SPM (Strokes Per Minute) | How many full strokes you complete in one minute. | Shows your stroke rate. Lower SPM with higher power is often more efficient for endurance. |
| Watts/Power | The amount of power you are generating with each stroke. | Direct measure of your physical output. Higher watts mean more power. |
| 500m Split | The time it would take to row 500 meters at your current pace. | Common measure of rowing intensity. A lower split time means you’re rowing faster. |
| Calories | Estimated calorie burn during your workout. | Useful for tracking energy expenditure. It’s an estimate, so don’t get too focused on exact numbers. |
| Distance | How far you’ve “rowed” in meters. | Great for setting goals and tracking overall progress over time. |
Warming Up and Cooling Down
Just like any exercise, preparation matters. Don’t skip these steps.
- Warm-up (5-10 minutes): Start with light cardio like marching in place or arm circles. Then, do some light rowing at a low intensity. This prepares your muscles for work.
- Cool-down (5-10 minutes): Finish with light rowing at a very easy pace. Follow this with gentle stretches. Focus on hamstrings, quads, glutes, and your back. This helps with recovery and flexibility.
Your Rowing Machine Checklist
Before each workout, quickly run through this list. It ensures you’re ready to go.
- Feet securely strapped in?
- Damper set to your preferred level (3-5 for beginners)?
- Are you sitting tall with a straight back at the catch?
- Are you pushing with your legs first on the drive?
- Are your arms extending first on the recovery?
- Is your rhythm smooth and controlled?
There you have it! The rowing machine offers a fantastic workout for your entire body. By following these steps and focusing on good form, you’ll be well on your way to enjoying all the benefits it has to offer. Keep practicing, and remember to listen to your body.
Conclusion
You now have all the tools to confidently approach your rowing machine. Remember, it’s about connecting those four phases into one fluid motion, powered by your legs, not just your arms. Focus on maintaining good posture throughout the stroke. We found that consistent practice with correct form is what truly transforms your workout. Don’t be afraid to experiment with damper settings early on to find your comfort zone. Take this guide and start rowing today; your body will thank you for this incredible full-body exercise!
Frequently Asked Questions
How often should a beginner use a rowing machine?
For beginners, we recommend starting with 2-3 sessions per week. This allows your body to adapt and recover properly. Aim for 20-30 minutes per session, including warm-up and cool-down.
Is rowing better than running for cardio?
Both are excellent for cardio, but rowing offers a more complete full-body workout. Running primarily targets your lower body, while rowing engages about 85% of your muscles. It’s also lower impact than running, which can be gentler on your joints.
Can I lose belly fat by using a rowing machine?
Yes, regular rowing can contribute to overall fat loss, including belly fat. It’s a high-calorie-burning exercise that helps create a calorie deficit. For best results, combine it with a balanced diet.
What should my SPM (Strokes Per Minute) be?
For beginners, a good target SPM is often between 20-25. Focus on power and technique over speed initially. As you get more experienced, you might see higher SPMs depending on your workout goal, but remember that a high SPM doesn’t always mean a better workout.
Do I need special shoes to row effectively?
No, you don’t need special rowing shoes. Any athletic shoe with a relatively flat and stable sole will work well. Avoid overly cushioned or unstable shoes. Barefoot rowing is also an option for some people.