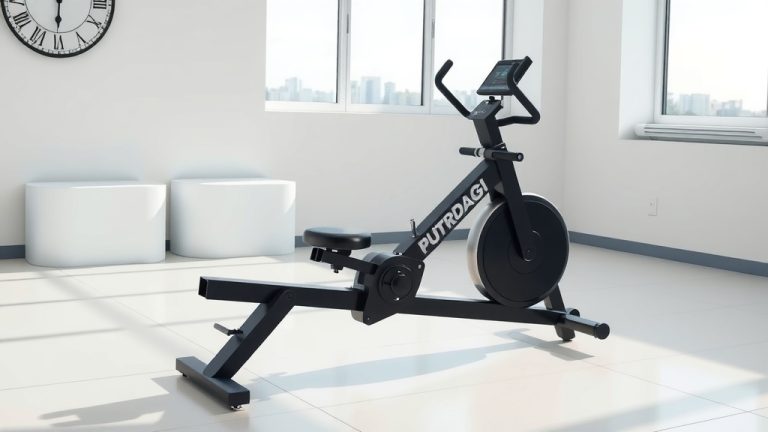
How To Use Erg Rowing Machine?
To use an Erg Rowing Machine effectively, you must first master the four phases of the rowing stroke: the catch, the drive, the finish, and the recovery. Focus on proper form and engaging your legs, core, and arms in sequence for a full-body workout.
Proper technique on a rowing machine involves a powerful leg push, followed by a strong core engagement, and finally a pull with your arms, reversing this motion smoothly for the recovery phase. Consistent practice helps refine your stroke.
- Proper Erg rowing starts with setting up your machine correctly, including footstraps and damper.
- The stroke involves a sequential movement: legs, core, then arms for power.
- The recovery phase reverses this: arms, core, then legs return to the start.
- Maintaining a strong, connected core throughout the stroke is key for efficiency and injury prevention.
- Practice these steps consistently to build strength and endurance for a full-body workout.
How To Use Erg Rowing Machine?
Using an erg rowing machine involves a powerful, fluid movement that trains your entire body. We found that mastering the sequence of catch, drive, finish, and recovery is your first step to unlocking its potential.
Setting Up Your Erg: First Steps
Before you even think about pulling, you need to set up your machine. This ensures comfort and prevents strain. Adjust your foot straps so the strap goes across the balls of your feet, snug but not tight. You want your feet to feel secure.
Understanding the Damper Setting
The damper setting on the side of the flywheel isn’t about resistance; it controls how much air gets into the flywheel. Think of it like bike gears. A higher setting, like 8-10, feels like a heavier boat, while a lower setting, 1-3, feels lighter. Many experts suggest starting around a damper setting of 3-5 to build good technique (Concept2).
The Four Phases of the Rowing Stroke
The rowing stroke is a cycle, a graceful dance between power and recovery. Breaking it down helps you understand each part. Let’s look at the catch, drive, finish, and recovery – your journey to effective rowing.
Phase 1: The Catch Position
This is where you start. Sit tall, with your shins vertical and knees bent. Your arms should be straight, gripping the handle lightly. Lean forward slightly from your hips, aiming for a “ready to launch” feeling. Your body is poised, prepared for action.
Phase 2: The Drive – Powering Through
This is the heart of the stroke, where the magic happens. Push powerfully with your legs first. Imagine pushing the machine away from you. As your legs extend, lean back slightly, then pull the handle towards your lower ribs. It’s a legs, core, then arms sequence, flowing smoothly.
Phase 3: The Finish Position
You’ve completed the powerful part! At the finish, your legs are straight, you’re leaning back slightly (around an 11 o’clock position), and the handle is at your lower ribs. Your elbows are slightly behind your body. This is a moment of controlled completion before recovery.
Phase 4: The Recovery – Returning Smoothly
Now, reverse the motion. Extend your arms away from your body first. Then, lean forward from your hips. Finally, allow your knees to bend, sliding forward until you’re back in the catch position. It’s an arms, core, then legs sequence, mirroring the drive.
Common Mistakes to Avoid
Learning anything new comes with a few missteps. On the erg, many people make these common errors. Being aware helps you correct them quickly and row more effectively. Don’t worry, everyone learns as they go.
-
Rushing the recovery: Take your time getting back to the catch. It’s not a race there.
-
Arm-only pulling: Remember, your legs are your power source. Don’t just yank with your arms.
-
Slouching: Keep your core strong and back straight. Good posture is key for power and safety.
-
“Shoot the slide”: This happens when your butt slides back before your legs have pushed. Push with your feet first.
-
White-knuckling the handle: Relax your grip. A lighter grip helps prevent forearm fatigue.
Tips for a Better Rowing Experience
Want to make your rowing workouts even better? A few simple tips can make a huge difference. From breathing to cadence, these small adjustments can really boost your performance and enjoyment.
| Aspect | Good Practice | What to Avoid |
|---|---|---|
| Breathing | Exhale during the drive, inhale during recovery | Holding your breath, shallow breathing |
| Stroke Rate | Lower rate (20-24 SPM) for power, higher for cardio | Extremely high rates with poor form |
| Core Engagement | Keep abs braced throughout the stroke | Rounding your back, letting core relax |
| Foot Drive | Push through heels and balls of feet | Lifting heels too early in the drive |
Maintaining Proper Posture
Maintaining a strong, upright posture is non-negotiable for rowing. It prevents injury and ensures you get the most out of each stroke. Think of a string pulling you up from the crown of your head, keeping your spine elongated and stable.
Connecting Your Body
The beauty of rowing lies in its connected movement. Your legs, core, and arms work together as one unit. Visualize a chain reaction, where power from your legs flows smoothly through your core to the handle. This “connection” creates a powerful, efficient stroke.
The Importance of Leg Drive
Many experts say your legs account for roughly 60% of the power in a rowing stroke. If you’re not driving hard with your legs, you’re missing out on a huge part of the workout. Think of it as a jump: legs initiate the movement, not your arms.
Finding Your Rhythm
Rowing is as much about rhythm as it is about power. Find a smooth, consistent cadence. The drive should feel powerful and quick, while the recovery is more controlled and relaxed. We found that a 1:2 ratio (drive:recovery) often feels natural and efficient (NIH).
Starting Your Rowing Journey
Ready to try it out? Don’t feel like you need to be perfect from day one. Start with shorter sessions, focusing purely on form. Gradually increase your duration and intensity as your body adapts. Remember, consistency is the true winner for building fitness and skill.
Checklist for Your First Row:
- Footstraps secure?
- Damper setting appropriate?
- Sitting tall with good posture?
- Arms straight at the catch?
- Legs push first?
- Handle to lower ribs at finish?
- Arms extend before leaning forward on recovery?
Conclusion
Mastering the erg rowing machine is a rewarding journey. By focusing on proper setup, understanding the four phases of the stroke, and avoiding common errors, you’re well on your way to a highly effective full-body workout. Remember, it’s about technique and consistency, not just brute strength. Keep practicing, and you’ll soon feel the rhythm and power of a great rowing stroke.
How do I set the resistance on a rowing machine?
The “resistance” on most popular erg rowing machines, like Concept2, is adjusted using the damper setting on the side of the flywheel. This isn’t a direct resistance knob but rather controls how much air enters the fan housing. A higher damper setting (e.g., 8-10) feels like a heavier boat, requiring more effort per stroke, while a lower setting (e.g., 1-3) feels like a lighter, faster boat. Start with a middle-to-lower setting, like 3-5, to focus on good form.
What is the ideal stroke rate for effective rowing?
The ideal stroke rate (strokes per minute, SPM) varies based on your goal. For building power and endurance, a lower stroke rate (around 20-24 SPM) with a strong, controlled drive is often recommended. For higher intensity cardio or sprint work, you might increase to 28-32 SPM, but always prioritize good form over speed. Many coaches suggest starting slow to nail the technique before picking up the pace.
Should I lift my heels during the rowing stroke?
It’s generally fine for your heels to lift naturally at the catch position, especially if you have good ankle flexibility and can maintain a strong connection through the balls of your feet. However, avoid lifting your heels excessively early in the drive phase, as this can reduce the power generated by your legs. Push through your whole foot, aiming to keep your heels down for as long as possible during the initial leg drive.
How can I prevent lower back pain when rowing?
Preventing lower back pain on the rowing machine starts with maintaining a strong, stable core throughout the stroke. Avoid rounding your back at the catch or hyperextending it at the finish. Focus on hinging from your hips, not your waist, when leaning forward and back. Ensure your legs initiate the drive before your body lean and arm pull. We found that weak core muscles or poor posture often contribute to back discomfort (Mayo Clinic).
How long should a beginner row on an erg machine?
For beginners, start with shorter sessions to build technique and endurance gradually. Aim for 10-15 minute workouts, 2-3 times a week, focusing entirely on smooth, correct form rather than speed or distance. You can incorporate short intervals, like 1 minute of rowing followed by 1 minute of rest. As your fitness improves, you can slowly increase your session duration to 20-30 minutes, or even longer.