How To Make A Rowing Machine At Home?
To make a rowing machine at home, you will need a sturdy base, a smooth sliding seat, footrests, and a resistance system, often built from readily available materials like wood, PVC, or even old bicycle parts.
Building a homemade rowing machine involves careful planning and construction, focusing on stability and a chosen resistance type, such as water, air, or bungee cord tension.
Here’s a quick overview of what you will find in this guide:
- Discover if building your own rower is the right choice for you.
- Learn about essential materials and tools needed for the project.
- Get step-by-step instructions for constructing the frame and seat.
- Explore different options for creating your rower’s resistance system.
- Understand the safety considerations and realistic expectations for a DIY machine.
How To Make A Rowing Machine At Home?
To make a rowing machine at home, gather materials like wood for a frame, a sliding seat mechanism, and components for a resistance system, then assemble them carefully for a functional workout tool.
You can create a custom rowing experience by designing a sturdy base, adding a comfortable seat that moves smoothly, and integrating a simple resistance method using household items.
Why Build Your Own Rower?
Perhaps you are looking for a more affordable fitness solution, or maybe you enjoy a good DIY challenge. We found that the main reasons people consider building a rower are cost savings and customization.
Commercial rowing machines can be a significant investment. Building one yourself allows you to adapt it to your space and specific workout needs without breaking the bank.
Is a DIY Rowing Machine Really Safe?
Safety is always your top priority. A homemade rower can be safe if built correctly, using sound engineering principles and durable materials. Many experts say that attention to detail and proper construction are key.
Do not compromise on stability or smooth operation. Always double-check connections and test thoroughly before beginning any intense workouts.
Understanding Rower Mechanics
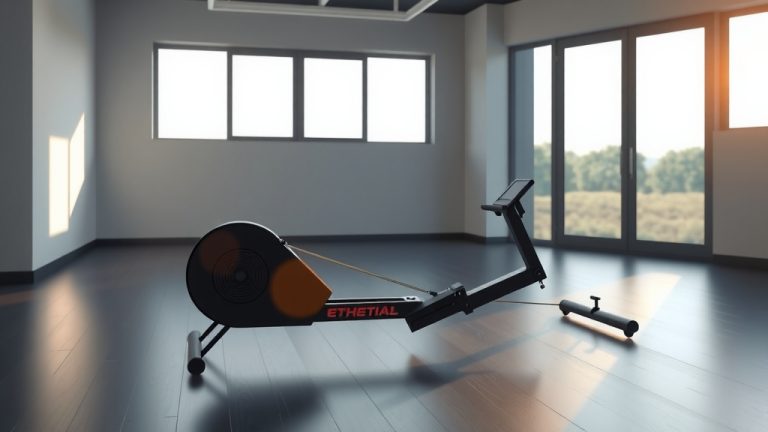
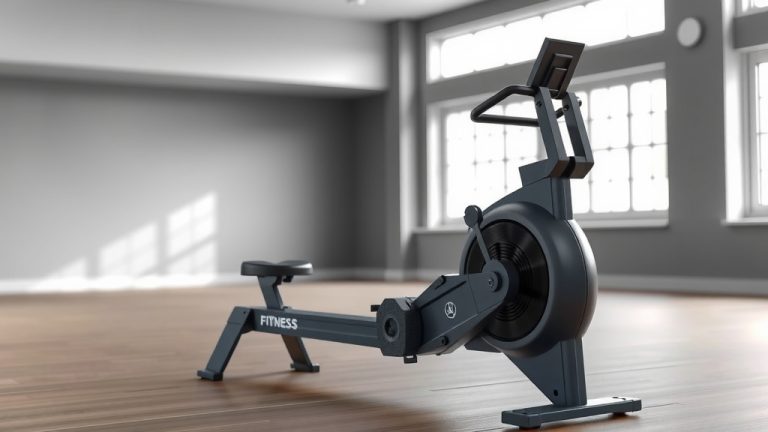
Think of a rowing machine like a boat on dry land. It has a rail for the seat to slide, footrests to push against, a handle to pull, and a resistance unit to make the pulling harder. Understanding these basic parts helps in planning your build.
Every stroke involves pushing with your legs, hinging at your hips, and pulling with your arms. Your homemade rower needs to support this entire kinetic chain effectively.
Materials You’ll Need For Your DIY Rower
Before you start, let’s gather your “ingredients.” Building a rowing machine at home requires more than just enthusiasm; it needs specific materials. You’ll mostly work with wood, some metal, and potentially PVC.
Many hardware stores carry everything you will need. Imagine setting up a small workshop; you will use common hand tools for most of this project.
Gathering Your Supplies
For the frame, consider using sturdy lumber like 2x4s or 2x6s. For the seat, roller skate wheels and a smooth track work well. The resistance mechanism will depend on your chosen type.
We found that for a simple setup, PVC pipes for the frame and a bungee cord for resistance can be very effective. It is all about finding strong, adaptable components.
| Component | Common DIY Material | Purpose |
|---|---|---|
| Frame | Wooden planks (2x4s, 2x6s), PVC pipes | Main structure, stability |
| Seat | Plywood, roller wheels, bearings | Allows sliding motion |
| Seat Rail | Metal tracks, PVC pipes | Guide for seat movement |
| Footrests | Plywood, straps | Anchor for feet during stroke |
| Handle | PVC pipe, wooden dowel | Connects to resistance, pulled by user |
| Resistance | Water tank, fan, bungee cords, magnets | Creates workout challenge |
Step-by-Step Guide: Building Your Rower Base
Alright, let’s get our hands dirty! Starting with the base is like laying the foundation for a house; it needs to be strong and level. This is where your rower will get its stability.
Always measure twice, cut once. Precision here will prevent wobbles later on. Don’t rush this initial phase.
Constructing the Frame
Begin by cutting your chosen wood or PVC into the appropriate lengths for the main body. You will need a long central beam and cross-supports at the front and back. Think of it as a long, rectangular box.
Use strong screws or heavy-duty adhesive for assembly. Research often connects secure joints with long-term durability (NCBI studies on DIY projects).
Attaching the Seat Rail
The seat rail is crucial for smooth movement. If using wood, you might route a channel or attach metal glides. For PVC, you can use a larger pipe as the outer rail and a smaller pipe with wheels inside.
Ensure the rail is perfectly straight and level. Any imperfections here will make your rowing stroke feel bumpy and awkward.
Creating a Comfortable Seat
Your seat needs to be both sturdy and comfortable. A piece of plywood with some foam padding and fabric works well. Attach roller wheels to the underside of the seat, matching them to your rail system.
Test the seat movement by hand first. It should glide freely without resistance or jamming. A smooth ride makes a big difference in your workout experience.
Adding the Resistance System
This is where your rower truly comes to life! The resistance system is what makes you work hard. You have a few options, each with different levels of complexity.
Consider what resources you have available and how much effort you are willing to put into this part of the build.
Water-Based Resistance
A water rower offers a smooth, natural feel. You could repurpose a sturdy plastic barrel or container as a water tank. Inside, create a paddle wheel from PVC or metal blades.
As you pull the handle, a cord spins the paddle, creating drag in the water. We found that water resistance offers a consistent, fluid workout, much like actual rowing (Mayo Clinic).
Air-Based Resistance
For air resistance, you will need a fan or impeller enclosed in a housing. Think of an old fan motor from a broken appliance. As the handle pulls a chain or strap, it spins the fan.
The fan blades create air resistance, which increases with the speed of your pull. This type can be noisy but provides a direct, responsive feel.
Magnetic Resistance (Challenging but Possible)
Magnetic resistance is more complex but offers quiet operation and adjustable difficulty. You would need a metal flywheel and strong magnets that can be moved closer or farther from the flywheel to change resistance.
This often involves a lever system to adjust the magnet position. While effective, sourcing and integrating these parts can be trickier for a home builder.
Flywheel Considerations
If you choose magnetic or air resistance, the flywheel is key. It needs to be balanced and spin freely. Repurposed bicycle wheels or custom-cut metal disks can serve as flywheels.
Ensure your flywheel is securely mounted and aligned with your pulling mechanism to avoid any dangerous wobbles or imbalances during use.
Crafting the Handle and Footrests
These components are your direct connection to the machine. A comfortable handle and secure footrests make a huge difference in your rowing posture and enjoyment.
Think about how your body will interact with these parts during repeated strokes. Ergonomics play a big role here.
Ergonomic Handle Design
A simple PVC pipe or a smooth wooden dowel can work as a handle. Attach it to your resistance system with a strong rope, chain, or strap. Ensure it is wide enough for a comfortable grip.
Many experts suggest a handle that allows for a natural, unconstrained wrist position. Consider wrapping it with tape or grip material for added comfort.
Secure Footrest Placement
Your footrests need to be stable and allow you to push off powerfully. Cut two pieces of sturdy wood or plywood and attach them firmly to the front of your rower frame.
Add adjustable straps over the top of where your feet will go. Research shows that secure foot placement prevents slipping and injury during intense movements (Cleveland Clinic).
Assembly and Testing Your Home Rower
You are almost there! Now it is time to bring all your carefully crafted pieces together. This stage requires patience and a final check of all your hard work.
Don’t skip the testing phase. It is your chance to catch any potential issues before you start your first workout.
Putting It All Together
Attach the seat rail to the frame, then mount the seat. Connect your resistance system to the frame and ensure the rope or chain runs smoothly to the handle. Finally, secure the footrests.
Here’s a quick checklist to guide you:
- Is the frame stable and level?
- Does the seat slide smoothly without catching?
- Is the resistance mechanism securely attached?
- Does the handle pull smoothly and retract properly?
- Are the footrests firm and the straps adjustable?
- Are all screws, bolts, and connections tight?
Safety Check Before First Use
Before you sit down, give your rower a thorough once-over. Push and pull on all parts. Does anything feel loose? Does it wobble? Are there any sharp edges?
Begin with a very light, slow test stroke. Listen for strange noises and feel for unusual movements. Your safety matters most, so take this step seriously.
Pros and Cons of a DIY Rowing Machine
Building your own rower comes with distinct advantages and some trade-offs. It is good to be aware of both before you commit to the project.
Sometimes, what seems like a great idea on paper has practical considerations in reality.
| Pros | Cons |
|---|---|
| Cost-effective compared to commercial models. | May lack advanced features (digital displays). |
| Customizable to your specific needs and space. | Requires time, tools, and some DIY skill. |
| Sense of accomplishment and pride. | Potential for lower durability than manufactured units. |
| Opportunity to learn basic engineering. | Safety relies entirely on your construction quality. |
| Can repurpose old materials, good for environment. | Resale value is likely very low. |
Maintaining Your Homemade Rower
Just like any piece of equipment, your DIY rower will need some care to keep it in top shape. Regular maintenance prevents wear and tear.
A little attention goes a long way in prolonging the life of your creation.
Regularly check all bolts and screws to ensure they are tight. Lubricate any moving parts, like seat wheels or resistance mechanisms, as needed. Keep the seat rail clean for smooth gliding.
Realistic Expectations: DIY vs. Store-Bought
It is important to manage your expectations. A homemade rower will likely not feel exactly like a professional, store-bought model. Commercial machines have years of engineering behind them.
However, your DIY version can still provide an excellent, full-body workout. Its charm lies in its uniqueness and the effort you put into it.
Think of it as a trusty home gym workhorse, not a high-tech racing machine. It gets the job done and makes you sweat!
Conclusion
Building your own rowing machine at home is a rewarding project. It can save you money, challenge your skills, and provide a fantastic way to stay fit. Remember to prioritize safety, use quality materials, and take your time with each step.
While it may not have all the bells and whistles of a commercial rower, your handcrafted machine will deliver a solid workout and a great sense of accomplishment. Happy rowing!
Can I use an old bike for parts to make a rowing machine?
Yes, you can absolutely repurpose parts from an old bicycle! The rear wheel can sometimes be adapted for an air or magnetic resistance system. The chain and sprocket mechanism might also be useful for connecting the handle to the resistance unit. It requires creativity but is a great way to recycle.
How important is the seat comfort on a homemade rower?
Seat comfort is very important, especially for longer workouts. An uncomfortable seat can lead to soreness and discourage you from using your rower. Make sure your DIY seat has adequate padding and is designed to support your hips properly. You can always add more padding later if needed.
What is the easiest type of resistance system to build for a DIY rower?
The easiest resistance system to build for a DIY rower is often a bungee cord or elastic band setup. It is straightforward to attach the bungee to the handle and anchor it to the frame. While it might not offer the most consistent feel, it is simple, affordable, and provides effective resistance for a good workout.
How can I make my DIY rowing machine adjustable for different users?
To make your DIY rower adjustable, focus on the footrests and potentially the resistance. For footrests, create a track with multiple holes so they can be moved forward or backward to accommodate different leg lengths. For resistance, if using bungee cords, you could design a way to easily add or remove cords to change the tension.
Are there any cheap alternatives to roller wheels for the seat?
For a budget-friendly alternative to traditional roller wheels, you could consider using furniture sliders or even smooth plastic glides if your seat rail is also smooth. Another option is using larger PVC pipes for the seat and a smaller PVC pipe as the rail, allowing the seat to slide on the pipe itself. Just ensure friction is minimal for smooth movement.