How to Row with Proper Form?
On this page (3 sections)
To row with proper form, you need to use your legs, core, and arms in a specific sequence. Focus on a powerful leg drive, a strong core connection, and a controlled arm pull and recovery.
Learning the correct technique helps you avoid injuries and get the most out of your workout. Many experts say that mindful practice leads to better results, making your rowing sessions more effective and enjoyable. We found that attention to detail really pays off.
TL;DR:
- Start with a powerful push from your legs.
- Engage your core as you lean back slightly.
- Pull the handle to your lower chest/upper abs.
- Recover by extending arms, then body, then bending knees.
- Keep it smooth and controlled for best results.
Ready to improve your stroke? Let’s walk through exactly how to row with proper form, step by step, so you can feel confident on the ergometer.
Mastering Your Rowing Technique
Learning to row correctly involves understanding a specific sequence of movements. It’s not just about pulling hard. We’ve found that focusing on technique makes your workouts much more effective and helps prevent injuries.
Setting Up for Success: Your Rowing Machine Checklist
Before you even start rowing, a good setup is key. Think of it like adjusting your car seat before a long drive. Small changes here make a big difference for your comfort and form.
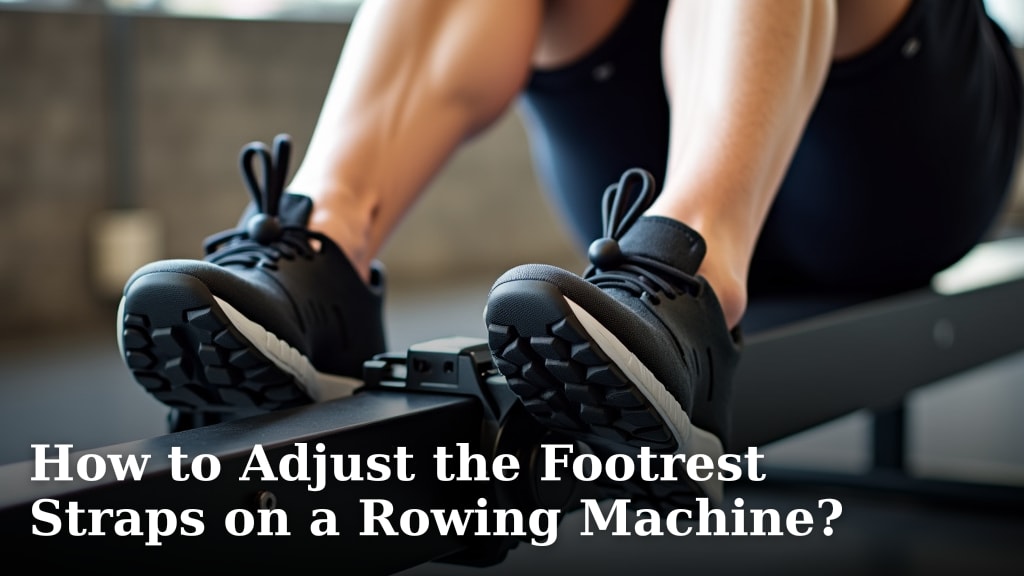
Foot Stretcher Adjustment
Your feet should be secure but not cramped. Proper foot placement helps you drive powerfully with your legs. We generally recommend that the strap crosses over the widest part of your foot (the ball of your foot).
- Sit on the machine.
- Place your feet in the foot stretchers.
- Adjust the height so the strap secures the ball of your foot.
- Your heels should be able to lift comfortably at the catch position.
Resistance Level (Damper Setting)
The damper setting controls how much air enters the flywheel. It feels a bit like gears on a bike. A common misconception is that a higher setting means a better workout, but that’s not always true.
Many experts, including Concept2 (a leading rowing machine manufacturer), suggest a lower to mid-range setting (typically 3-5 out of 10) for most general workouts. This allows for smoother strokes and helps you maintain good technique without unnecessary strain.
The Four Phases of the Rowing Stroke
Every rowing stroke has distinct parts, like movements in a dance. We break it down into four main phases: The Catch, The Drive, The Finish, and The Recovery. Understanding each phase helps you execute a smooth, powerful stroke.
Phase 1: The Catch (Starting Position)
This is where your stroke begins. Imagine you’re about to push off a wall. Your body should be coiled, ready to explode with power.
- Slide forward on the seat.
- Your shins should be vertical or nearly vertical.
- Arms are straight and relaxed in front of you.
- Your back is straight, leaning slightly forward (imagine 11 o’clock on a clock face).
- Wrists are flat, not bent.
- Your shoulders are relaxed.
We found that many people try to pull with their arms too early here. Resist that urge! Your legs will do most of the work.
Phase 2: The Drive (Power Generation)
This is where the magic happens – you generate power! It’s a powerful and connected movement. You initiate the drive using your legs, then your core, then your arms. Think “legs, core, arms.”
First, push powerfully through your heels and the balls of your feet. Extend your legs. As your legs extend, hinge back slightly from your hips. Your torso moves naturally with the leg drive. After your legs are mostly extended, then pull the handle towards your body. The core engagement here is crucial for transferring power from your legs to the handle.
It’s a common mistake to try and pull with your upper body too soon. Remember, you’re not just pulling the handle; you’re pushing with your legs to move your entire body away from the foot stretcher.
Phase 3: The Finish (End of the Stroke)
You’ve just completed the powerful part of the stroke. Now you’re at the end of the movement, ready to reverse direction. This position should feel strong and stable.
- Your legs are fully extended.
- Lean slightly back with a strong, engaged core (imagine 1 o’clock).
- The handle should be pulled into your lower chest or upper abdomen.
- Your elbows are bent, close to your sides.
- Shoulders are down and relaxed.
Hold this strong position for a brief moment. We found that pausing here briefly helps solidify the movement before returning.
Phase 4: The Recovery (Return to Start)
The recovery is like rewinding the drive, but in reverse order. It’s relaxed and controlled, setting you up for the next powerful stroke. Think “arms, core, legs.”
First, extend your arms straight forward until they clear your knees. Then, hinge forward slightly from your hips, bringing your torso back to that 11 o’clock position. Finally, allow your knees to bend, letting the seat slide forward towards the catch position.
It’s important that your arms and body move first before your knees bend. If you bend your knees too soon, the seat will hit your hands. This is often called “shooting the slide” and it breaks the rhythm of your stroke, making it less efficient.
The Pacing and Connection of Your Stroke
Think of rowing as a series of connected movements, not segmented parts. The goal is a smooth, continuous flow. The drive should be powerful and fast, while the recovery is slower and controlled. Many instructors suggest a 1:2 ratio: one count for the drive, two counts for the recovery.
| Phase | Key Action | Timing |
|---|---|---|
| The Catch | Set up, shins vertical, arms straight. | Ready |
| The Drive | Legs extend, then core, then arms pull. | Fast, Powerful (1 count) |
| The Finish | Legs extended, lean back, handle to chest. | Brief Hold |
| The Recovery | Arms extend, body forward, knees bend. | Controlled, Slower (2 counts) |
Common Rowing Mistakes to Avoid
Even with good intentions, it’s easy to fall into bad habits. Being aware of these common missteps can help you correct them quickly. We’ve all been there, and recognizing these helps you row smarter, not just harder.
- “Shooting the Slide”: Bending knees too early on the recovery, causing hands to get in the way. Focus on arms away, then body forward, then knees bend.
- Hunching Your Back: Rounding your back, particularly at the catch and recovery. Keep your back straight, engaging your core to support your spine (Mayo Clinic).
- Over-Compressing: Bringing your seat too far forward at the catch, past vertical shins. This can limit your power and comfort.
- Pulling Too Hard with Arms: Relying mainly on your arms during the drive. Remember, legs are the primary power source.
- Gripping Too Tightly: White-knuckling the handle can lead to forearm fatigue. Keep a relaxed but firm grip.
- Ignoring the Core: A weak core connection means less power transfer and potential back strain. Engage your abs throughout the stroke.
Checklist for a Perfect Rowing Stroke
Here’s a quick reminder checklist you can use next time you’re on the rowing machine. These key points bring everything together for a complete, efficient stroke:
- Are your shins vertical at the catch?
- Are your arms straight before your legs drive?
- Are you pushing with your legs first and hardest?
- Is your core engaged as you lean back slightly?
- Is the handle coming to your lower chest/upper abs?
- Are your arms extended before your knees bend on recovery?
Reviewing these mental cues can dramatically improve your technique over time. We found that consistent self-correction leads to lasting improvements.

Conclusion
You now have all the tools to execute a technically sound rowing stroke. Remember, consistently applying the “legs, core, arms” sequence on the drive and “arms, core, legs” on the recovery is essential. Pay attention to your setup and avoid common mistakes like “shooting the slide” or hunching your back. We’ve found that patience and mindful practice are your best allies.
Mastering proper form will not only prevent injury but also make your workouts much more effective and enjoyable. So, get on that erg, focus on your technique, and feel the difference in every powerful stroke!
Frequently Asked Questions
How often should I check my rowing form?
It’s helpful to do a quick form check at the beginning of every session. Even better, occasionally record yourself rowing with your phone. This lets you identify areas for improvement and correct them promptly.
What if my lower back hurts when I row?
Lower back pain often means your core isn’t engaged, or you’re rounding your back. Focus on maintaining a straight spine and initiating the drive with your legs, not your back. Strengthening your core outside of rowing can also help significantly.
Should I wear special shoes for rowing?
No special shoes are required. Any athletic shoe with a relatively flat and stable sole will work well. Avoid overly cushioned running shoes, as they can make it harder to feel a strong connection to the foot stretchers.
How can I make my rowing stroke more powerful?
Power comes primarily from your legs. Ensure you’re driving forcefully through your heels and the balls of your feet. Think about pushing your body away from the foot stretchers, not just pulling the handle. Incorporating strength training for your legs can also boost your power.
Is it better to row fast or with good form?
Always prioritize good form over speed. Rowing with poor form can lead to injury and actually reduce the effectiveness of your workout. Once your form is solid, you can gradually increase your intensity and speed while maintaining proper technique.