How to Use a Rowing Machine for Beginners?
On this page (5 sections)
To use a rowing machine for beginners, first, you need to learn the basic rowing stroke. This involves a four-phase movement: the catch, the drive, the finish, and the recovery. Mastering these steps will help you get the most out of your workout.
Learning proper rowing form is key for effective exercise and to prevent injuries. Many people jump on a rower without understanding how their body should move. We found that a good setup and understanding the flow make a big difference in your workout experience.
- Learn the four phases of the rowing stroke.
- Adjust your machine for your body size.
- Focus on legs, core, then arms for power.
- Practice a smooth, controlled recovery.
- Start with shorter, easier workouts.
Now, let’s walk through exactly how to set up your machine and perform each part of the rowing stroke, step by step.
Getting Started with Your Rowing Machine
Setting up your rowing machine correctly is the first step to a great workout. For more on this topic, see our beginner rowers for home guide. This ensures comfort and prevents strain. You want to feel secure and balanced before you even start.
Machine Adjustments for Your Body
Before you pull a single stroke, take a moment to adjust your rower. Proper adjustments help you get the most efficient workout. It also keeps you safer from injury.
Foot Stretcher Placement
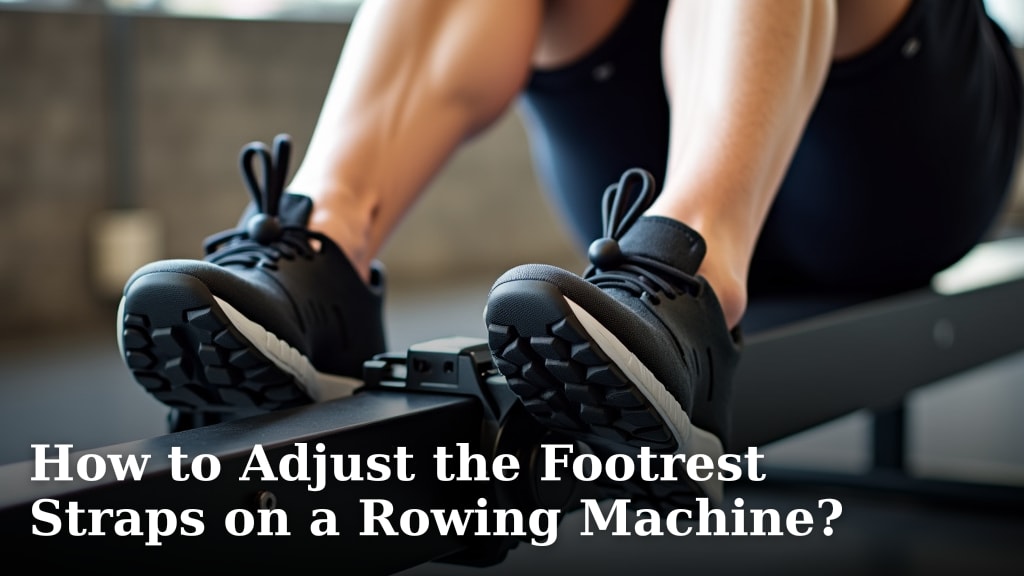
Your feet should be snug in the foot stretchers. Adjust the footrest straps so they go over the widest part of your foot. This is usually around the ball of your foot. A good rule of thumb is that your heels can lift slightly but your toes stay secure (American Council on Exercise).
If your feet are too high, you might feel unstable. If they are too low, your knees could get in the way. Experiment a little to find what feels right for you.
Handle Grip and Position
Hold the handle with a relaxed, overhand grip. Your thumbs can wrap around the bottom for security. Avoid gripping too tightly; this can tire your forearms. Keep your wrists flat, not bent up or down.
Imagine holding bicycle handlebars. You want a firm but not crushing grip. This helps transmit power smoothly from your body.
The Four Phases of the Rowing Stroke
Understanding these four phases is like learning the alphabet of rowing. Each part flows into the next. It’s a continuous, smooth motion.
Think of it as a dance: Catch, Drive, Finish, Recovery. Each step is important. Missing one throws off the rhythm.
Phase 1: The Catch
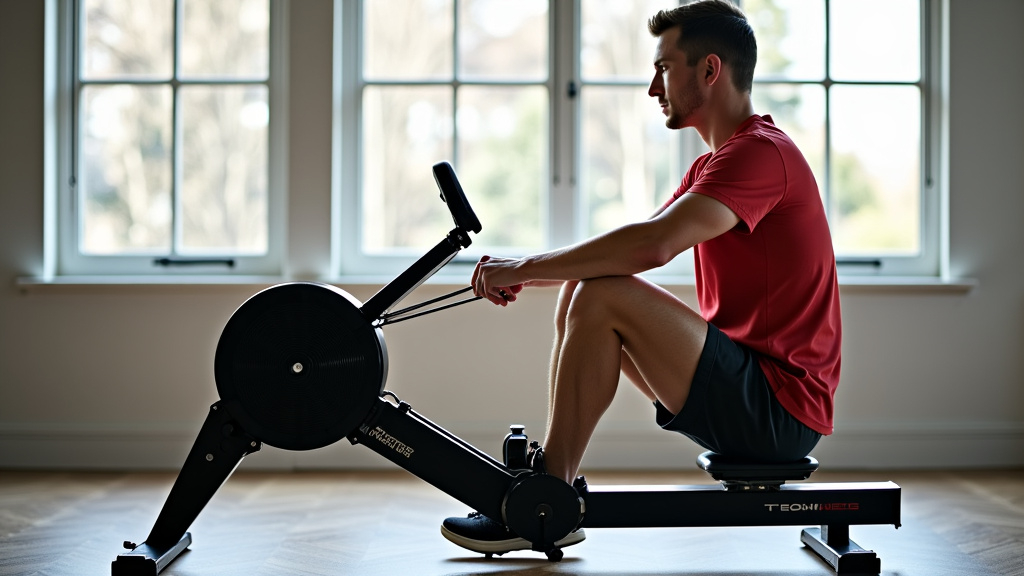
The catch is your starting position. You’re coiled and ready to explode. This is where you connect to the machine.
- Slide forward on the seat.
- Bring your knees up, shins vertical.
- Keep your back straight, leaning slightly forward from your hips.
- Your arms are straight, shoulders relaxed.
- The handle is directly in front of you.
Imagine you’re about to jump. You squat down, ready to spring. That’s the feeling of the catch.
Phase 2: The Drive
This is the power phase, where you push off with your legs. It’s the most important part for generating speed. Many experts say the power comes 60% from legs, 20% from core, and 20% from arms.
- Push hard with your legs.
- Keep your core engaged, lean back slightly as your legs extend.
- Pull the handle towards your chest, just below your ribs.
- Your arms finish the pull, bringing the handle in.
Think of it as a powerful leg press. Your legs do the big work first. Then your body and arms follow through.
Phase 3: The Finish
The finish is the end of your stroke. You’ve extended your body and pulled the handle in. This is a moment to feel your effort.
- Your legs are fully extended.
- Your body leans slightly back (about 11 o’clock if you imagine a clock face).
- The handle is at your lower ribs.
- Your elbows are pulled back, close to your body.
- Your shoulders are relaxed, not hunched up.
You’ll feel strong and extended. Your muscles should feel engaged. This position sets you up for the next phase.
Phase 4: The Recovery
The recovery is your return to the catch position. It’s a controlled glide back, not a rush. This phase allows you to prepare for your next powerful stroke.
- Extend your arms straight first.
- Lean your body forward from the hips.
- Allow your knees to bend, letting the seat slide forward.
- Keep your core engaged throughout.
- Move smoothly back to the catch position.
Order is key here: Arms, Body, Legs. Don’t let your knees bend too early or too quickly. This can make your stroke jerky. Think slow and steady wins the race for this part.
Mastering Your Rowing Form
Good form is everything on a rowing machine. It makes your workout effective and protects your body. Bad form can lead to aches and pains you want to avoid.
The Power Sequence: Legs, Core, Arms
Many beginners make the mistake of pulling with their arms first. But your legs are your strongest muscles. Use them!
We found that thinking “legs, core, arms” during the drive helps. It creates a powerful, efficient stroke. Reverse this for the recovery: “arms, core, legs.”
| Phase | Action | Key Focus |
|---|---|---|
| Catch | Compressed, ready to push | Shins vertical, straight back |
| Drive | Push with legs, then lean back, then pull arms | Legs (60%), Core (20%), Arms (20%) |
| Finish | Extended, handle at ribs | Straight legs, slightly reclined body |
| Recovery | Straighten arms, hinge forward, bend knees | Arms first, then body, then legs |
Common Mistakes to Avoid
It’s easy to fall into bad habits. Being aware of them helps you correct your form. Your body will thank you later.
“Shooting the Slide”
This happens when you push your legs back too quickly before your body leans back or your arms pull. You end up with straight legs and bent arms, still far from the finish. It wastes power and can strain your back.
Remember the sequence. Legs, then body, then arms. Let your body connect to your legs’ power.
Rounding Your Back
A rounded back, especially at the catch, puts stress on your spine. Keep your back straight, leaning from your hips. Imagine a straight line from your head to your tailbone.
A strong core helps maintain this posture. Look ahead, not down at your feet.
Over-Reaching at the Catch
Don’t try to slide too far forward. Your shins should be vertical, not past vertical. Over-reaching can cause your lower back to round. It also puts undue pressure on your knees.
Aim for that strong, coiled position. No need to stretch beyond what feels natural.
Getting Started with Workouts
Once you understand the basic stroke, it’s time to put it to practice. Start slow and build up your endurance. You’re learning a new skill.
Your First Rowing Session Checklist
Before you begin your first workout, double-check these simple things. It helps make sure you’re ready to go and safe.
- Foot stretchers adjusted correctly.
- Loose, comfortable clothing.
- Water bottle within reach.
- Understand the four phases mentally.
- Set a timer for your workout duration.
Now you’re prepared. You’ve set yourself up for success. What’s next?
Beginning Your Workout
Start with a warm-up. This prepares your muscles for activity. A good warm-up prevents stiffness.
Row gently for 5-10 minutes at a very light intensity. Focus purely on form. Don’t worry about speed or power yet. Just feel the movement of the stroke.
For your main workout, try short intervals. For example, row for 5 minutes, then rest for 2 minutes. Repeat this 2-3 times. This allows you to practice form without getting too tired.
As you get more comfortable, gradually increase your rowing time. You can also try shorter rest periods. Listen to your body.
Finish with a cool-down. Row gently for 5 minutes again. Then perform some light stretching. This helps your muscles recover.
Finding Your Rhythm and Pace
Rowing is about rhythm. It’s not about how fast you can go from the start. A smooth, consistent pace is more effective.
As you recover, focus on a controlled return. This gives you time to breathe. It also lets your muscles prepare for the next powerful drive.
You’ll notice your stroke rate on the machine’s monitor. For beginners, a rate of 20-25 strokes per minute is a good starting point. Don’t try to row too fast. Focus on making each stroke strong and complete. You’ll build power more effectively this way.
Conclusion
You now have a solid foundation for using a rowing machine. Remember that consistency and correct form are your best allies. Focus on mastering the four phases of the stroke and the “legs, core, arms” power sequence.
Be patient with yourself as you learn this new exercise. You’ll build endurance and power over time. Start slow, listen to your body, and enjoy the full-body benefits of rowing. Your next step is to hit the rower, apply these tips, and feel the difference in your workout!
Frequently Asked Questions
How often should a beginner use a rowing machine?
For beginners, we recommend starting with 2-3 sessions per week. Allow a day of rest in between to let your muscles recover and adapt. As you build stamina, you can gradually increase frequency.
What is a good intensity for beginner rowing workouts?
Focus on a moderate intensity where you can hold a conversation, but still feel challenged. A good indicator is feeling slightly out of breath. Avoid pushing yourself to exhaustion too early.
Should I wear special shoes for rowing?
No special shoes are required. Running shoes or any athletic shoe with a flat, stable sole works well. Avoid overly cushioned or minimalist shoes that might make your feet unstable in the foot stretchers.
How can I tell if my foot placement is correct on the rower?
Your feet are correctly placed when the strap goes over the widest part of your foot, allowing your heels to lift slightly at the catch while your toes remain secure. This position helps you drive powerfully through your legs.
Is rowing a good workout for weight loss?
Yes, rowing is an excellent full-body exercise that burns a lot of calories. Combining regular rowing workouts with a balanced diet can certainly support your weight loss goals effectively.